For tellers who call and serve clients at the counter.
EZQueue · Main app
Service Staff Manual
For tellers who call and serve clients at the counter.
1Sign in
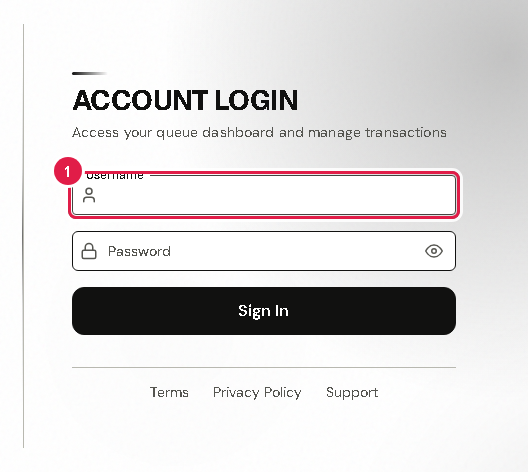
Open EZQueue and sign in with your username and password.
What this is for
You need to sign in before you can call clients.
Before you start
Your username and password.
Access to your email, if this is a new computer.
Steps
Type your username in the Username box.
Type your password in the Password box.
Tap Sign In.
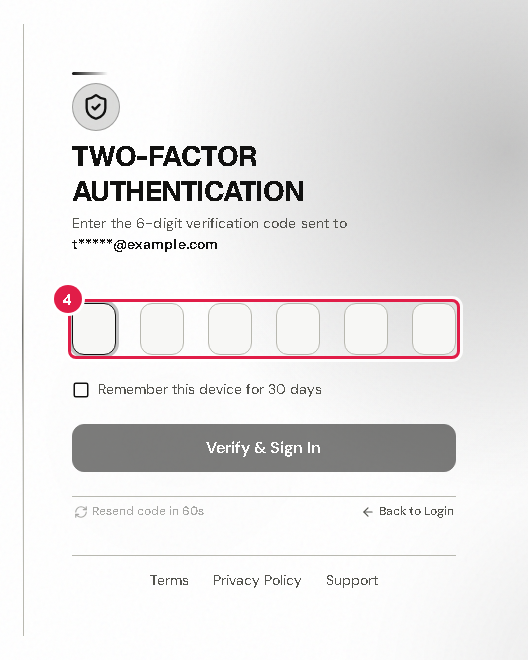
If you see Two-Factor Authentication, check your email. Type the 6-digit code from the email.
On your own work computer, tick Remember this device for 30 days. Then you will not need a code each time.
Tap Verify & Sign In. Your Dashboard opens.
Tip If the system asks you to make a new password, type it in New Password and again in Confirm New Password. Then tap Update Password.
If something goes wrong
No code in your email: wait a minute, check your spam folder, then tap Resend verification code.
You forgot your password: ask your office admin or the system admin to reset it.
Wrong page or stuck: tap Back to Login and start again.
2Check your station
Make sure you are linked to the right counter before you call clients.
What this is for
Your station is your counter or window, for example "Window 3". The TV screen tells clients which station to go to. You cannot call clients without one.
Before you start
You are signed in.
Steps
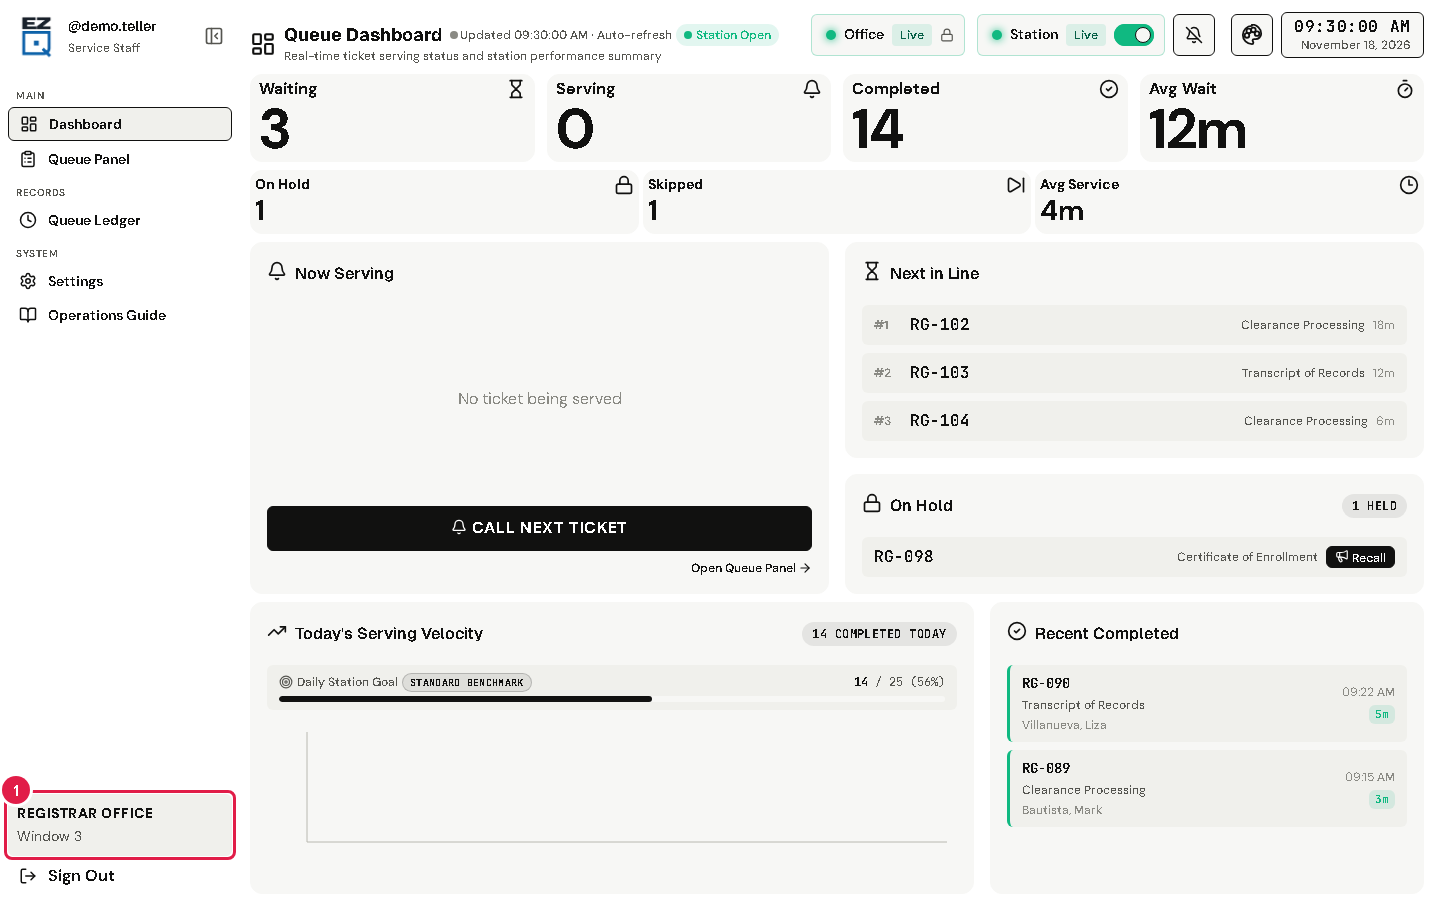
Look at the bottom of the left menu. It shows your office and your station.
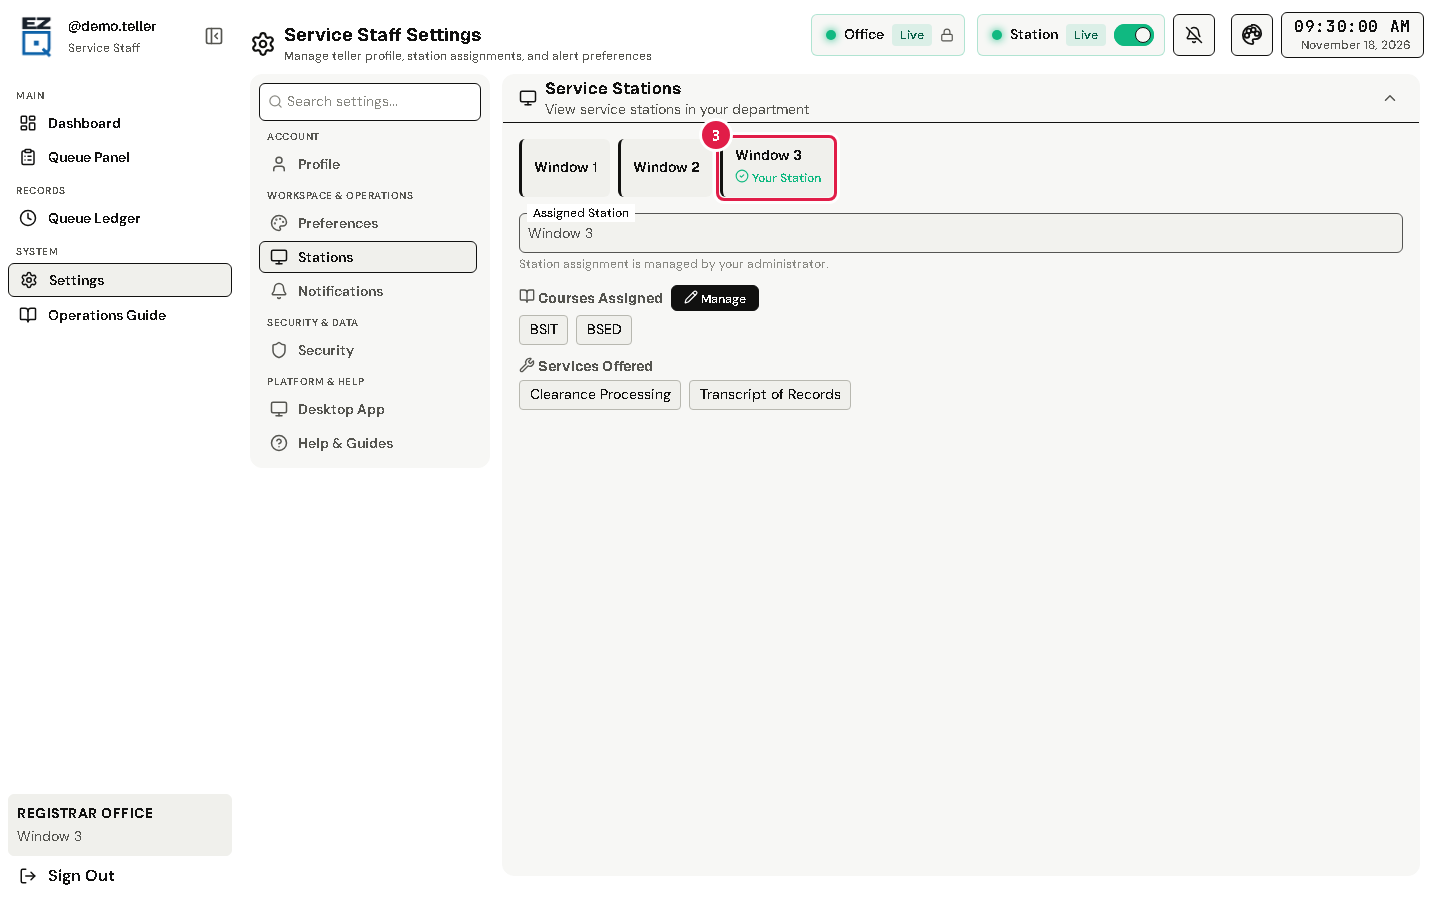
To see more, tap Settings in the left menu.
Tap the Stations tab. Your station has the label Your Station.
Under your station you can see which services and courses it handles.
Warning Only an admin can change your station. If it is wrong, ask your office admin before you call anyone.
If something goes wrong
"No active station assigned" on the Queue Panel: ask your office admin to give you a station.
The wrong station is shown: do not call clients yet. Ask your office admin to fix it.
3Show or hide your station on kiosks
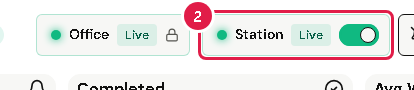
Use the Station switch at the top to show or hide your station on kiosks.
What this is for
The chips at the top of the page show if your office and station are shown on kiosks.
Before you start
You are signed in and have a station.
Steps
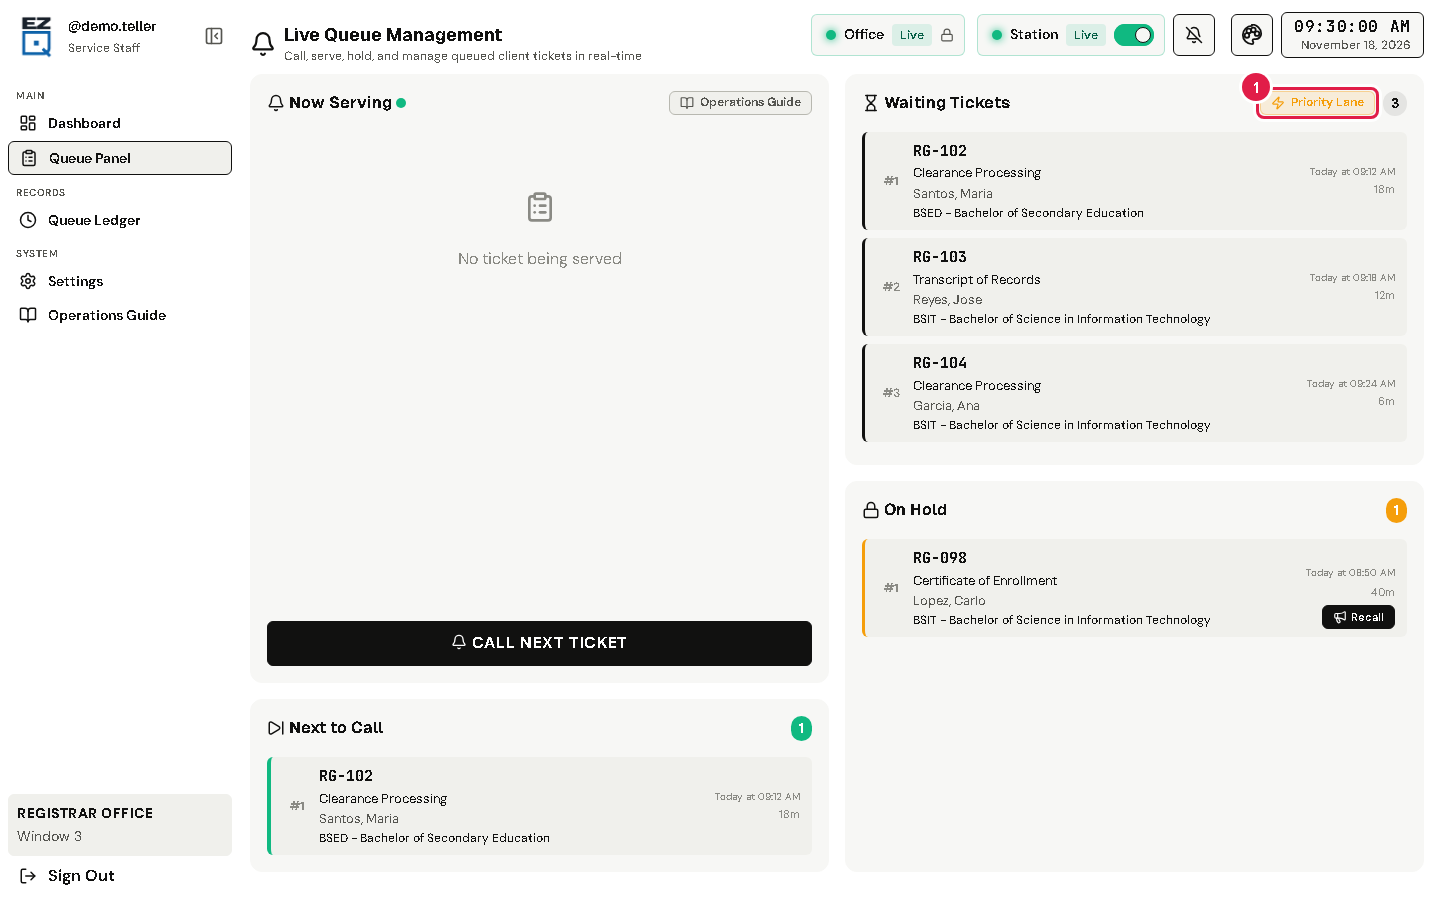
Look at the top of the page. The Station chip says Live (shown on kiosks) or Hidden (hidden from kiosks).
To change it, tap the switch on the Station chip.
The Office chip has a lock. Only the office admin can change it.
4Read your dashboard
See how many clients are waiting and how much you have done today.
What this is for
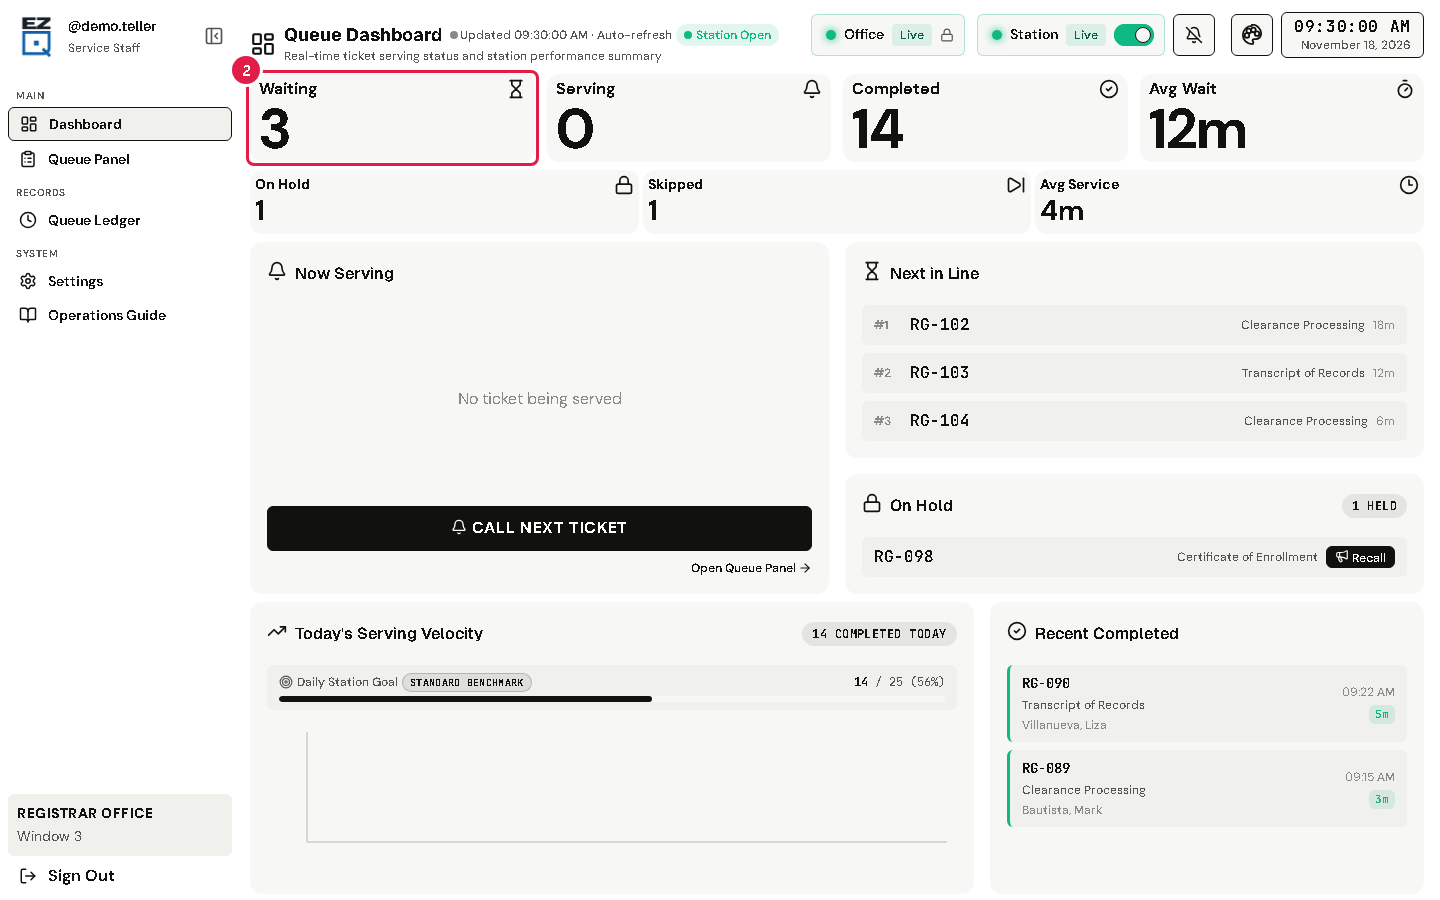
The Queue Dashboard is the first page after you sign in. It shows the clients waiting for your station and your work today.
Before you start
You are signed in.
Steps
Tap Dashboard in the left menu.
Read the boxes at the top:
Waiting: clients waiting for your station now.
Serving: the client at your counter.
Completed: clients you finished today.
Avg Wait: how long your clients today waited before you called them, on average.
Point at a box, or tap it, to see more. For example, Waiting shows how many priority clients are in line.
Tip The smaller boxes show On Hold, Skipped and Avg Service. Avg Service is how long you took per client today, from call to finish.
If something goes wrong
The numbers do not change: check your internet connection. The page updates by itself every few seconds.
5Call the next client
Call the next person in line to your counter.
What this is for
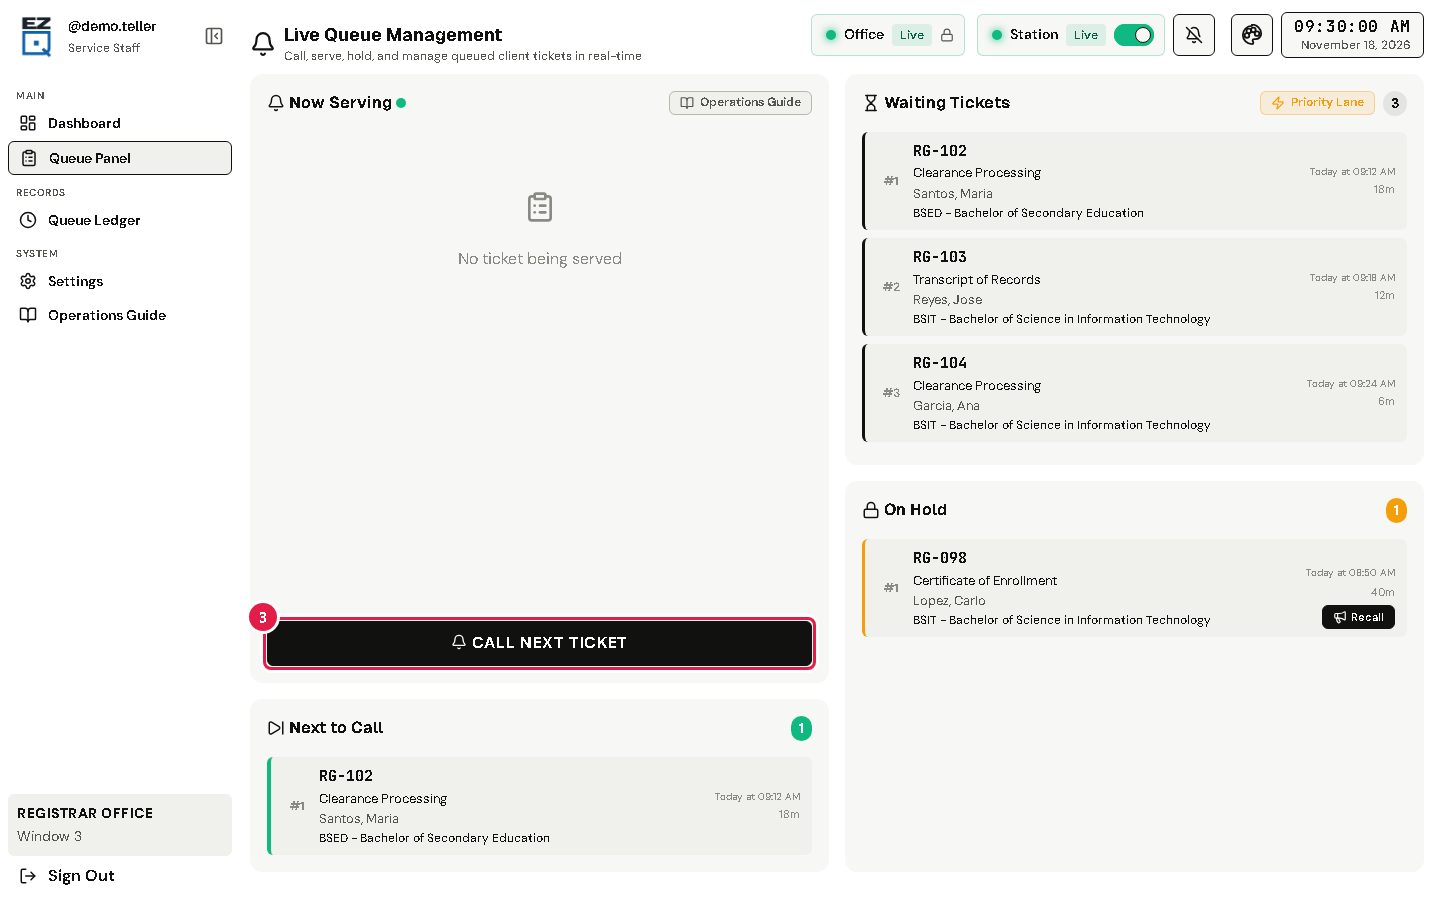
When you are free, you call the next client. Their number shows on the TV screen and is read out loud.
Call the client again, give them one more chance, or skip them.
What this is for
Sometimes a client does not hear their number. You can call them again, send them back into the line, or skip them.
Before you start
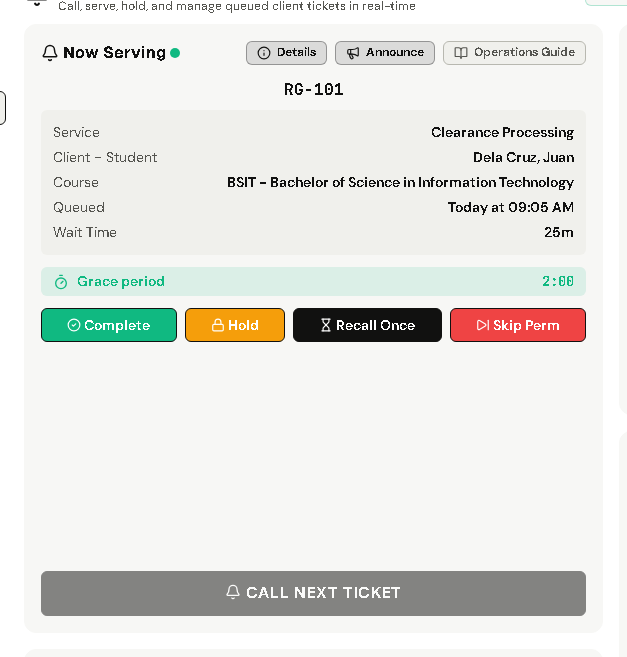
The client's ticket is under Now Serving.
Steps
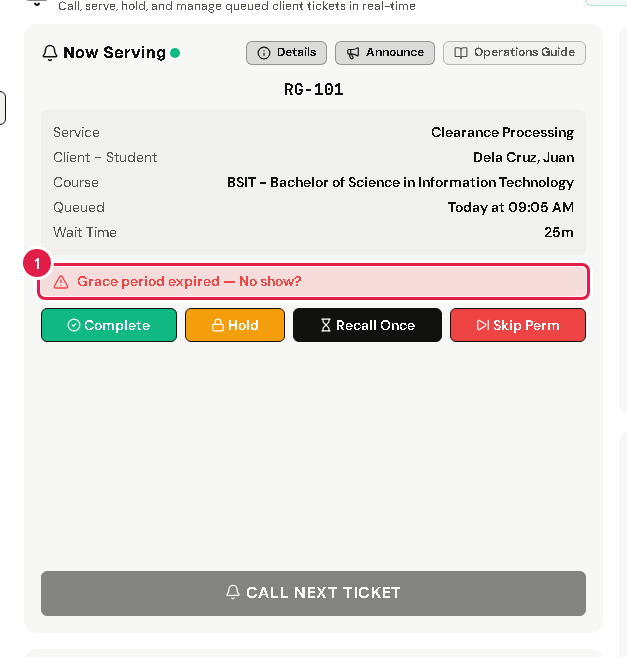
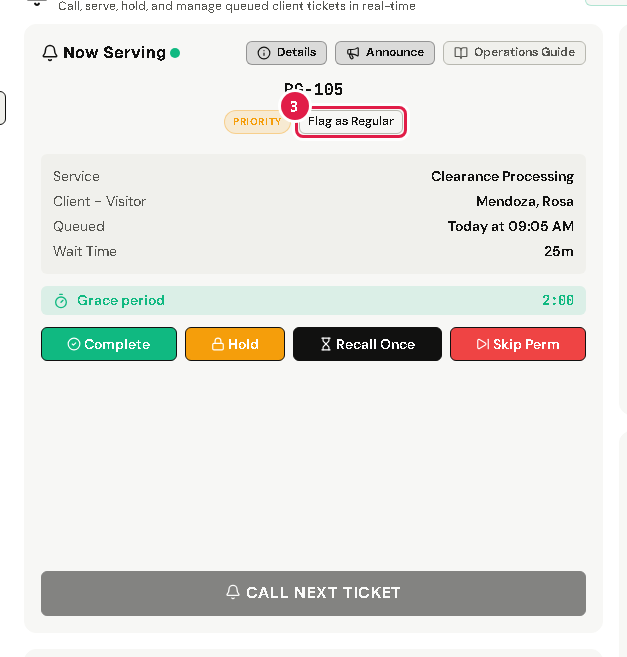
Watch the Grace period timer. It turns to Grace period expired — No show? when time is up.
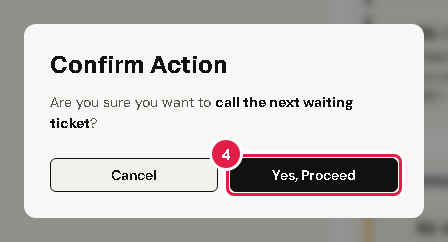
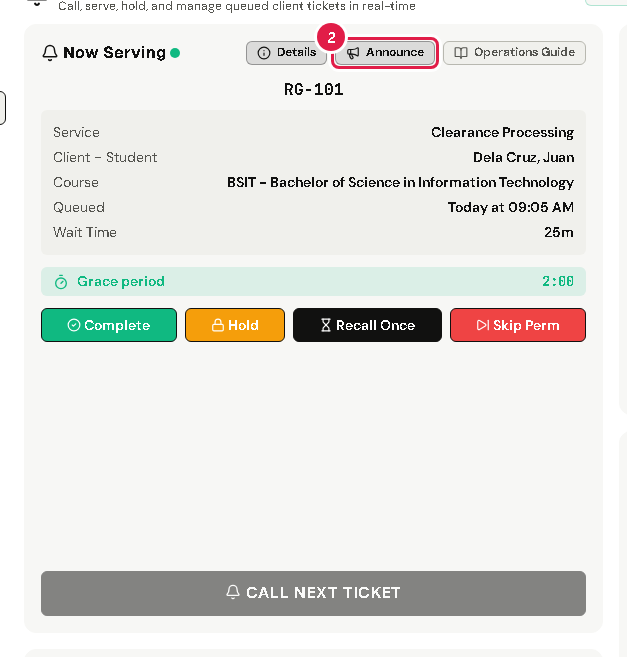
To call the same number again on the TV, tap Announce, then Yes, Proceed.
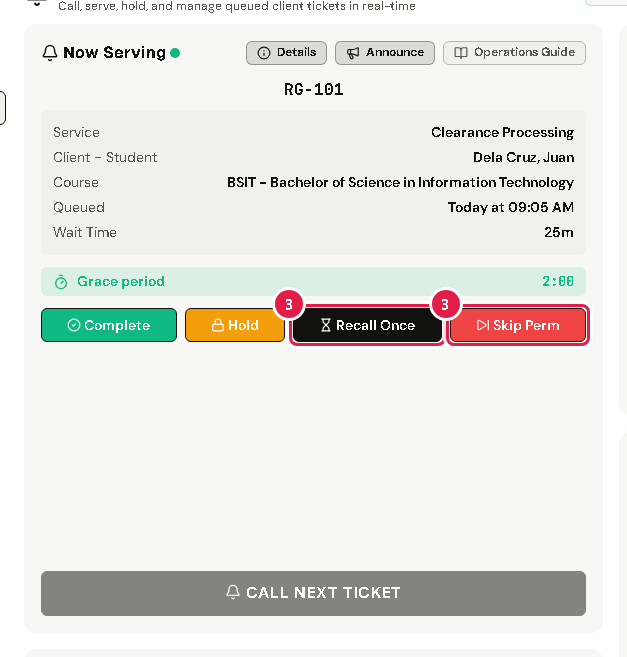
If the client still does not come, choose one:
Recall Once: the ticket goes back to the end of the waiting line. It will be called again later.
Skip Perm: the ticket leaves the line for good. It cannot be called again.
Tap Yes, Proceed to confirm. You can now call the next client.
Warning When the grace period runs out, EZQueue moves the ticket back to the end of the line by itself. This takes up to a minute. It also happens if the client is still at your counter.
If something goes wrong
You used Skip Perm by mistake: there is no undo. The client must get a new ticket.
7Put a client on hold
Pause a client who needs to step away, then call them back later.
What this is for
Hold puts a ticket aside without skipping it. Use it when a client must step away and come back. You can serve other clients while the ticket is on hold.
Before you start
The client's ticket is under Now Serving.
Steps
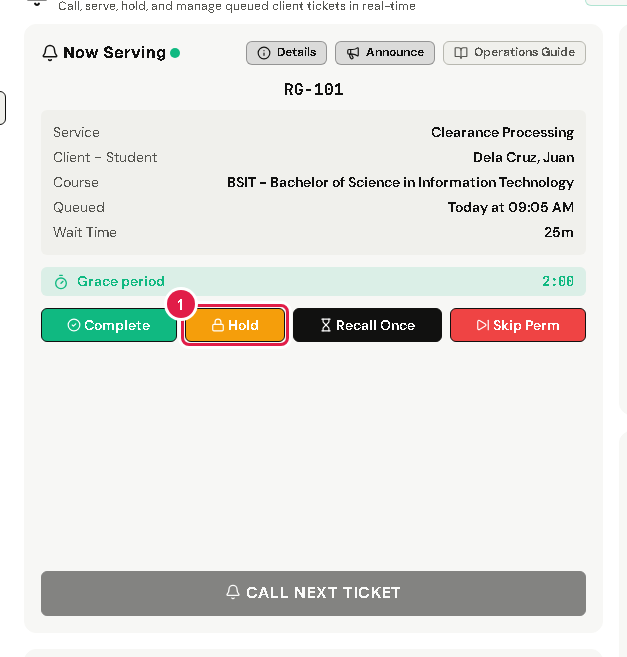
Tap Hold, then Yes, Proceed.
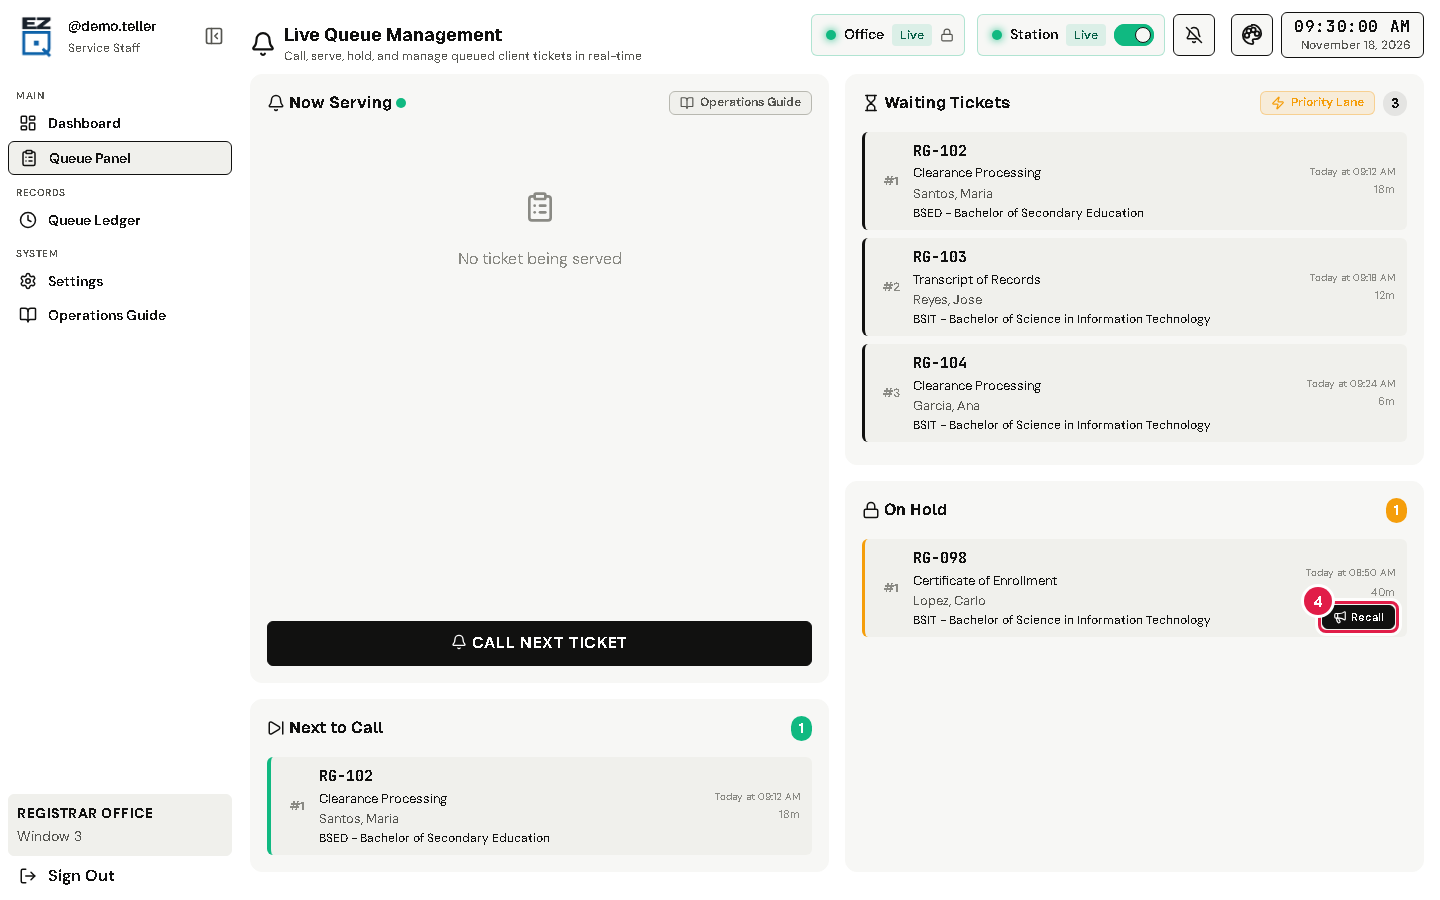
The ticket moves to the On Hold list on the right. You can now call the next client.
When the client comes back, finish the client you are serving first.
In On Hold, find their ticket and tap Recall. Then tap Yes, Proceed.
The ticket is back under Now Serving.
If something goes wrong
Recall is grey: you are still serving someone. Finish that client first.
8Finish serving a client
Mark the ticket as done when you have helped the client.
What this is for
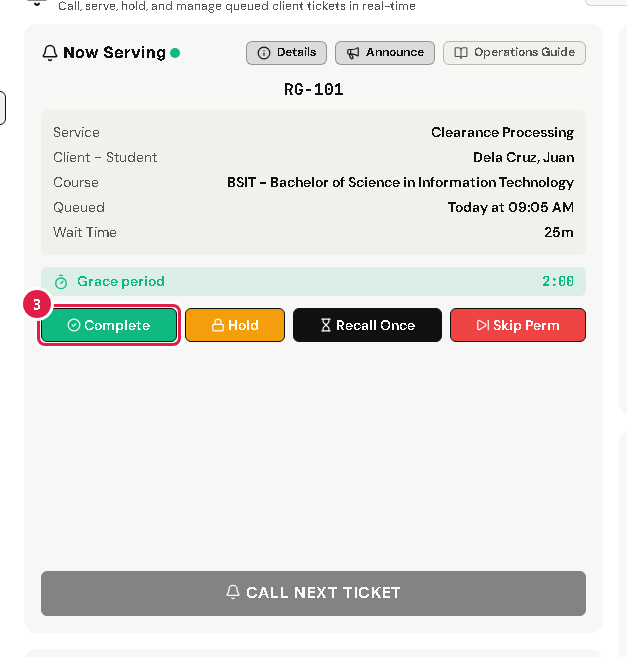
When you finish helping a client, mark the ticket as complete. This frees you to call the next client and counts toward your work for the day.
Before you start
The client's ticket is under Now Serving.
Steps
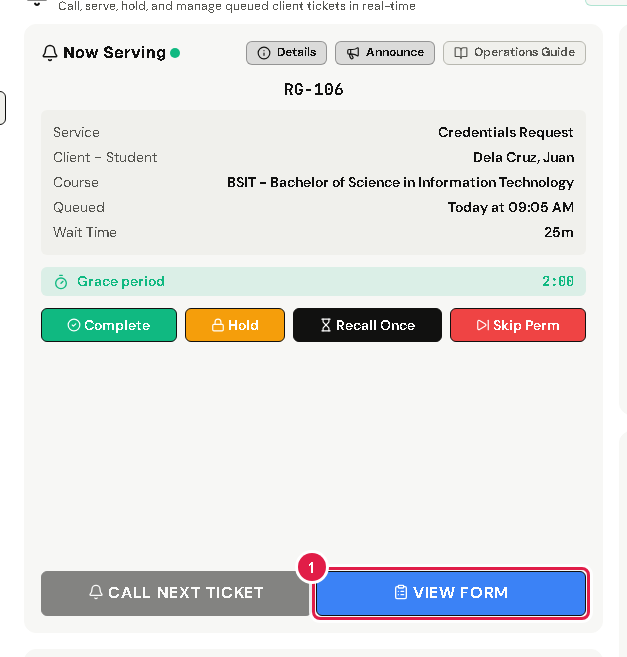
Some services have a form the client filled in. If you see VIEW FORM, tap it to read the form. To print it, tap Open in new tab or window.