Tell the kiosk who you are, so it asks only what it needs.
What this is for
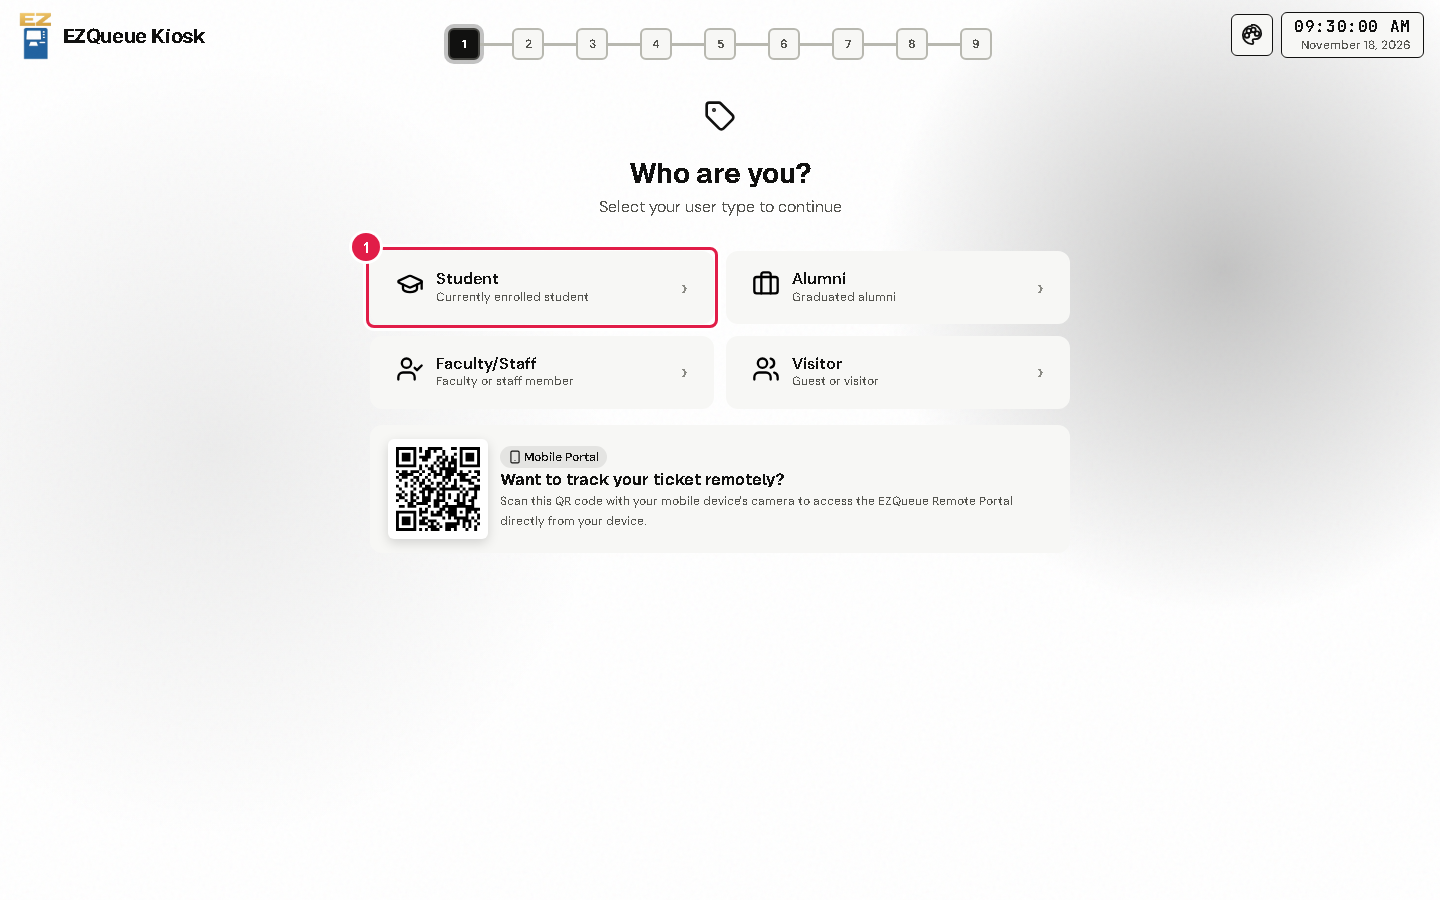
The kiosk gives you a ticket number for an office. First, it asks what kind of client you are.
Before you start
Students and alumni: have your ID number ready.
Faculty and staff: have your employee ID ready.
Steps
Tap the box that fits you: Student, Alumni, Faculty/Staff or Visitor.
The next screen asks for your name and details. See Type your details.
Tip Want to wait away from the office? Scan the QR code under Want to track your ticket remotely? with your phone camera.
If something goes wrong
You tapped the wrong box: tap Back on the next screen.
The kiosk shows a message that it is closed: the office is not giving tickets right now. Ask the staff at the counter.
2Type your details
Enter your name and ID, and a phone number or email if you want to.
What this is for
The kiosk asks who you are. Then it asks how to reach you, which you can skip.
Before you start
You chose who you are on the first screen.
Steps
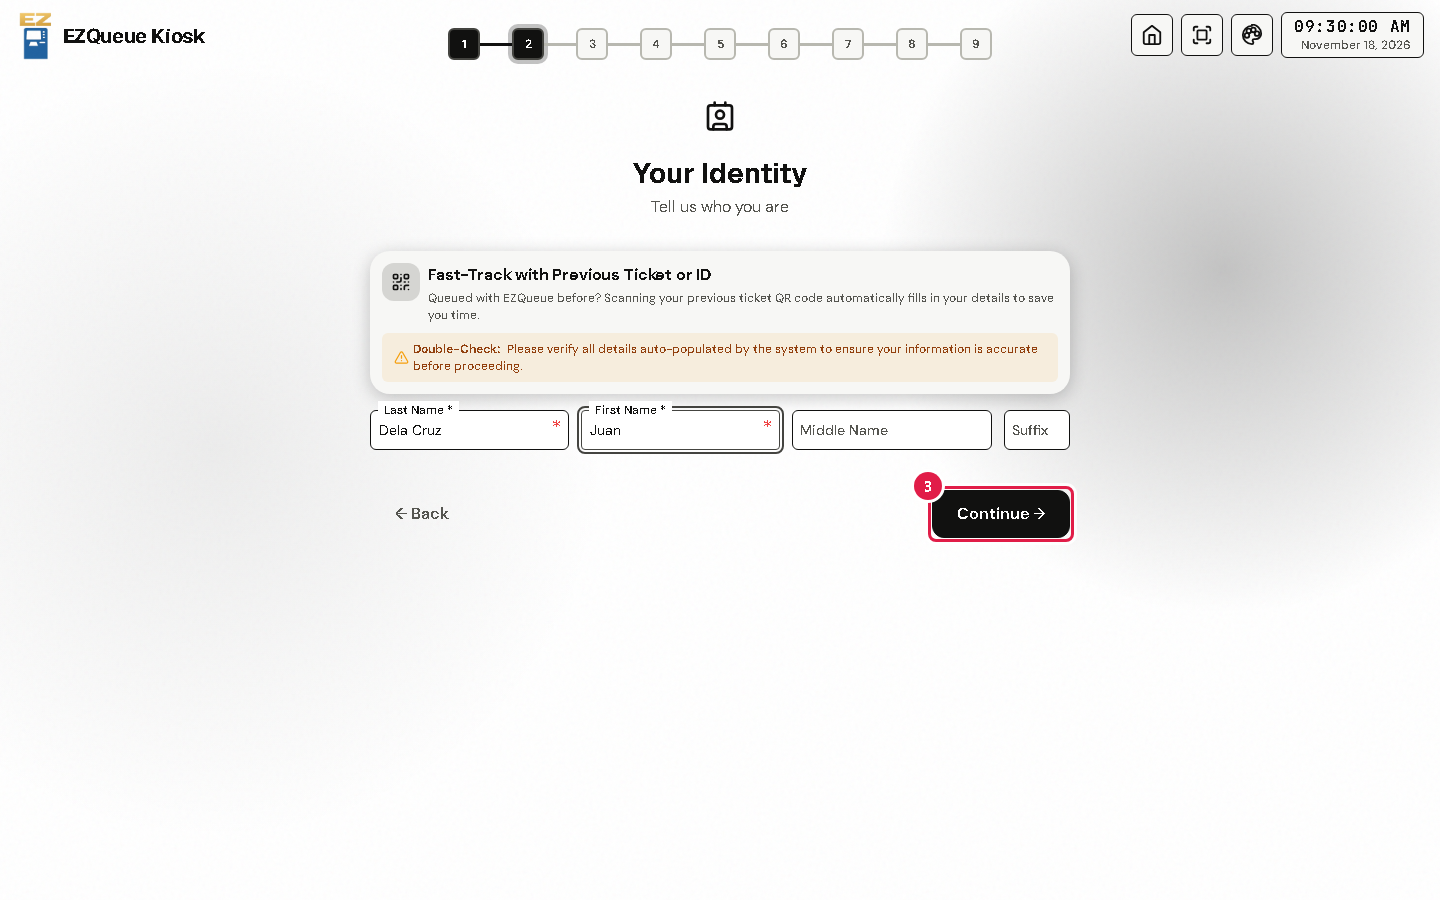
Students, alumni, faculty and staff: type your ID number. If you have an ID with a QR code, you can tap Scan QR instead.
Type your Last Name and First Name. Students, alumni, faculty and staff also choose their course or college.
Tap Continue.
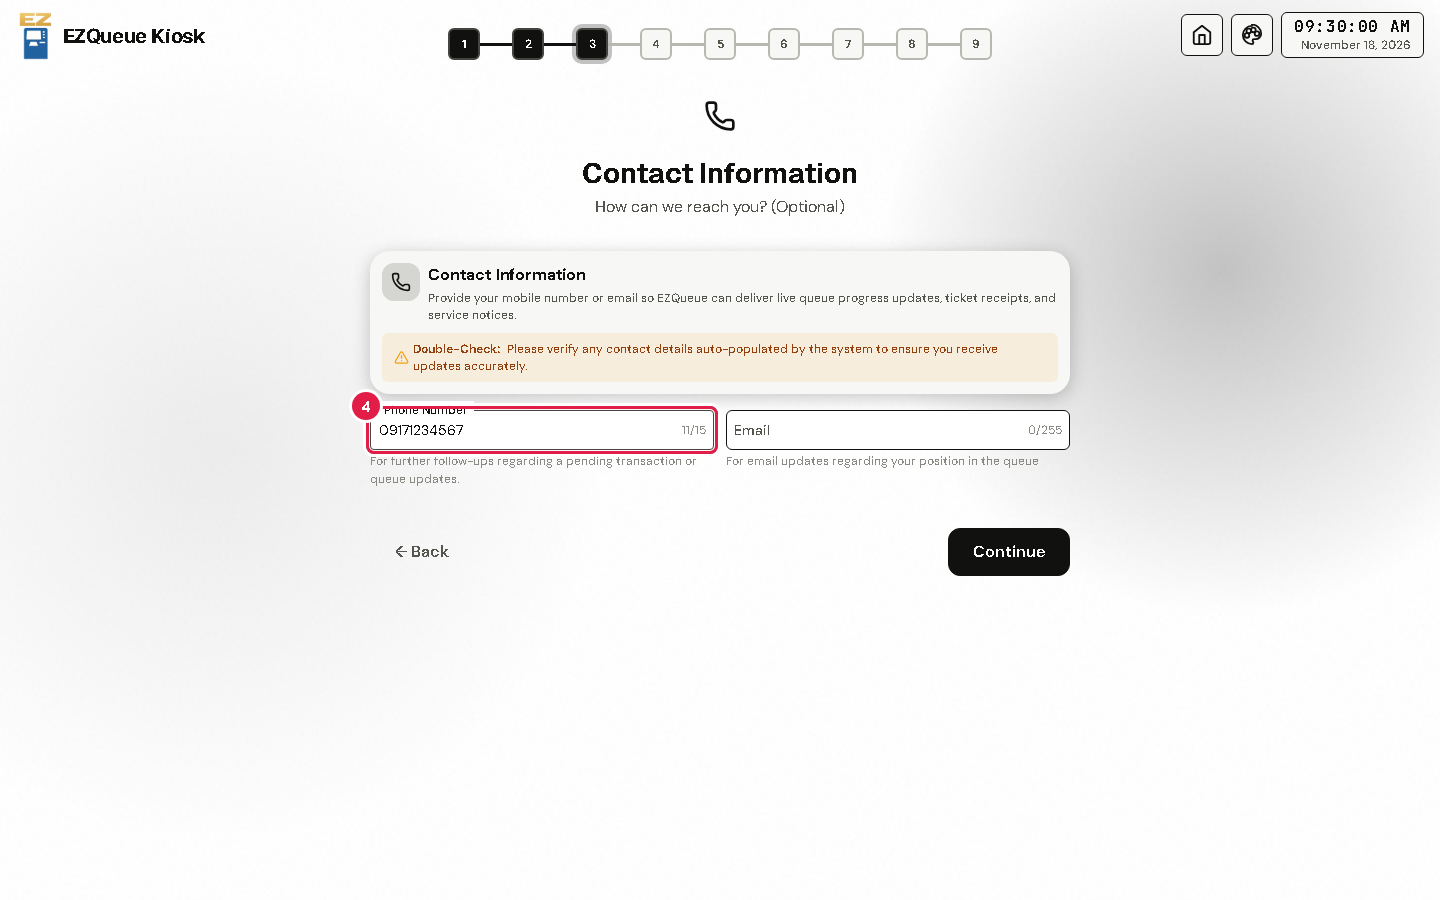
The Contact Information screen is optional. You can type your Phone Number and Email, or leave them empty.
Tap Continue.
Tip The kiosk gives regular tickets only. Senior citizen, PWD or pregnant? Ask the staff at the counter first. Offices that use the Priority Lane can register you there.
If something goes wrong
Continue is grey: a box with a star (*) is still empty. Fill it in.
"Active Queue Detected": you already have an active ticket in the office it names. Use that ticket, or ask the staff at the counter.
3Choose the office and service
Pick where you need to go and what you need there.
What this is for
Each office has its own line. Choosing the right office and service puts you in the right line.
Before you start
You typed your details.
Steps
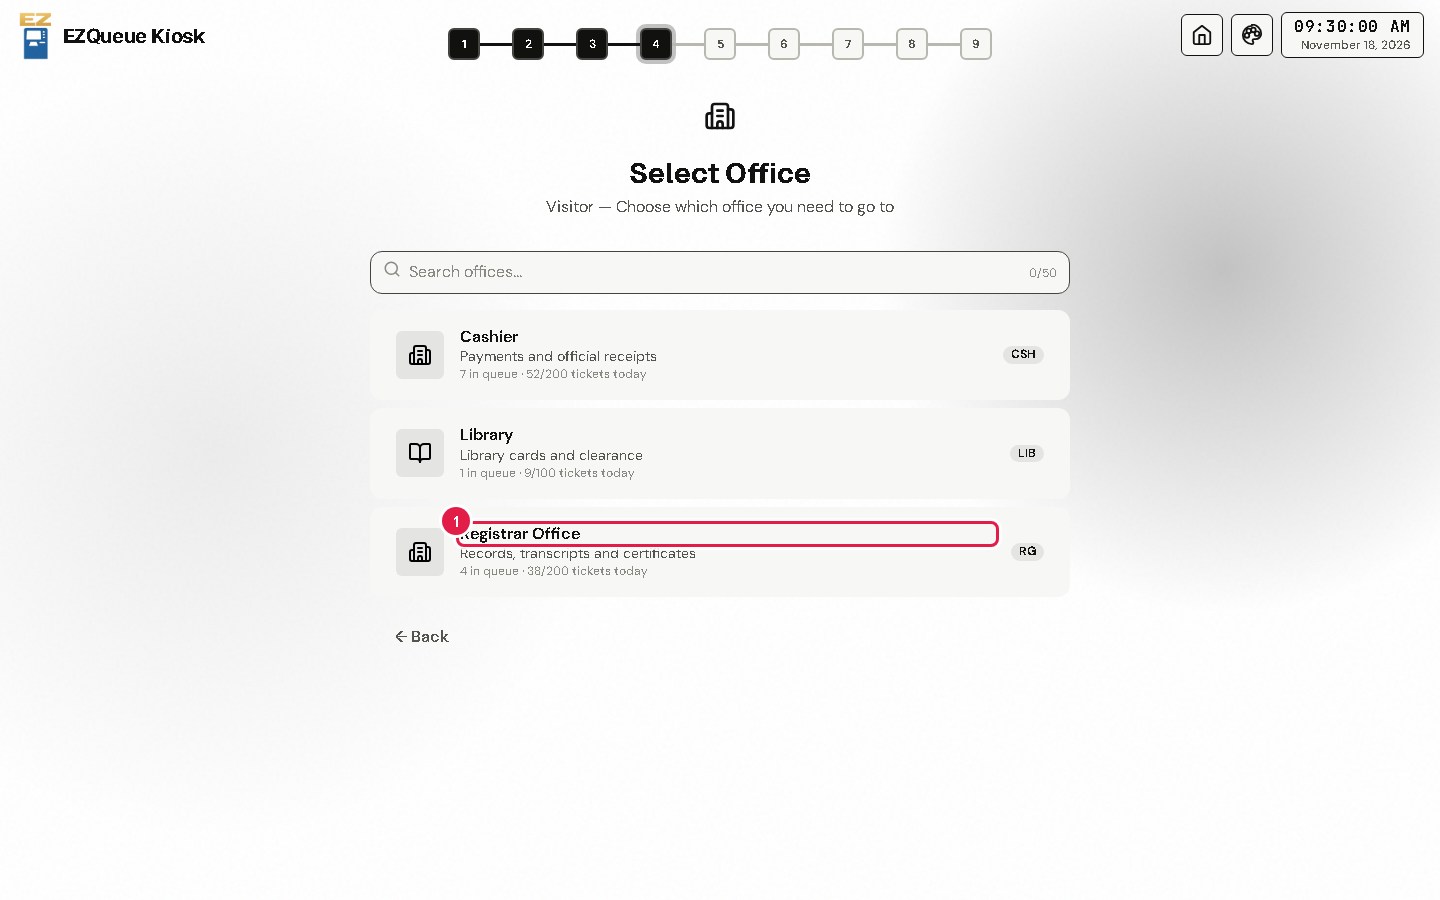
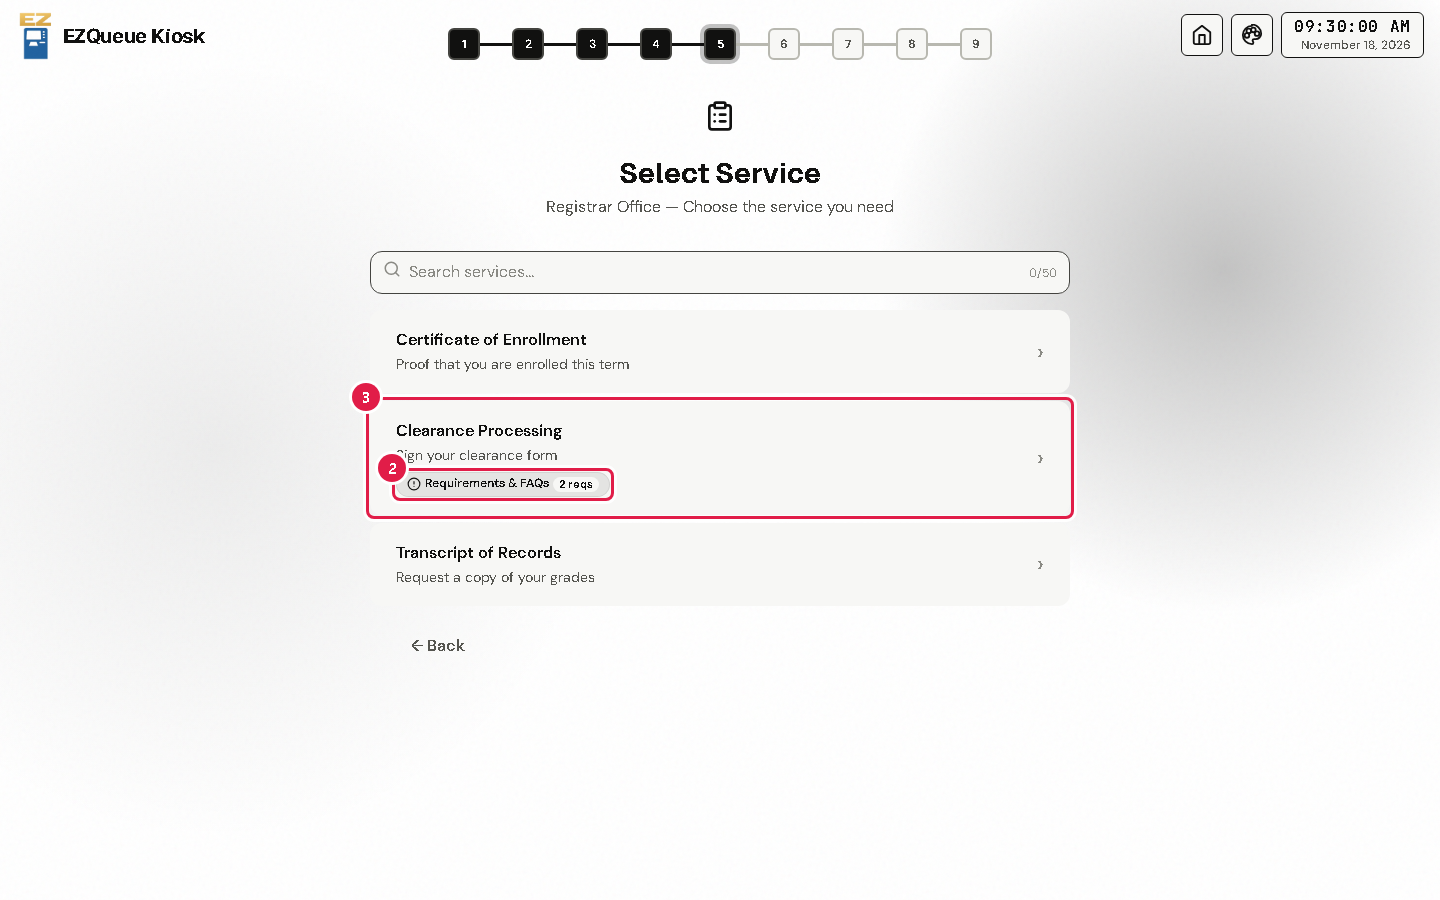
Tap the office you need, for example Registrar Office. You can type its name in Search offices... to find it fast.
To see what to bring, tap Requirements & FAQs under a service.
Tap the service you need.
Some offices let you choose more than one service. Then tick each one and tap Proceed.
If something goes wrong
Your office is grey or says it is closed: it is not giving tickets right now. Ask the staff nearby.
You do not see the service you need: ask the staff at that office's counter.
4Check your request and get the ticket
Add a note if needed, check everything, then confirm.
What this is for
Before the kiosk makes your ticket, you can add a short note and check that everything is right.
Before you start
You chose the office and service.
Steps
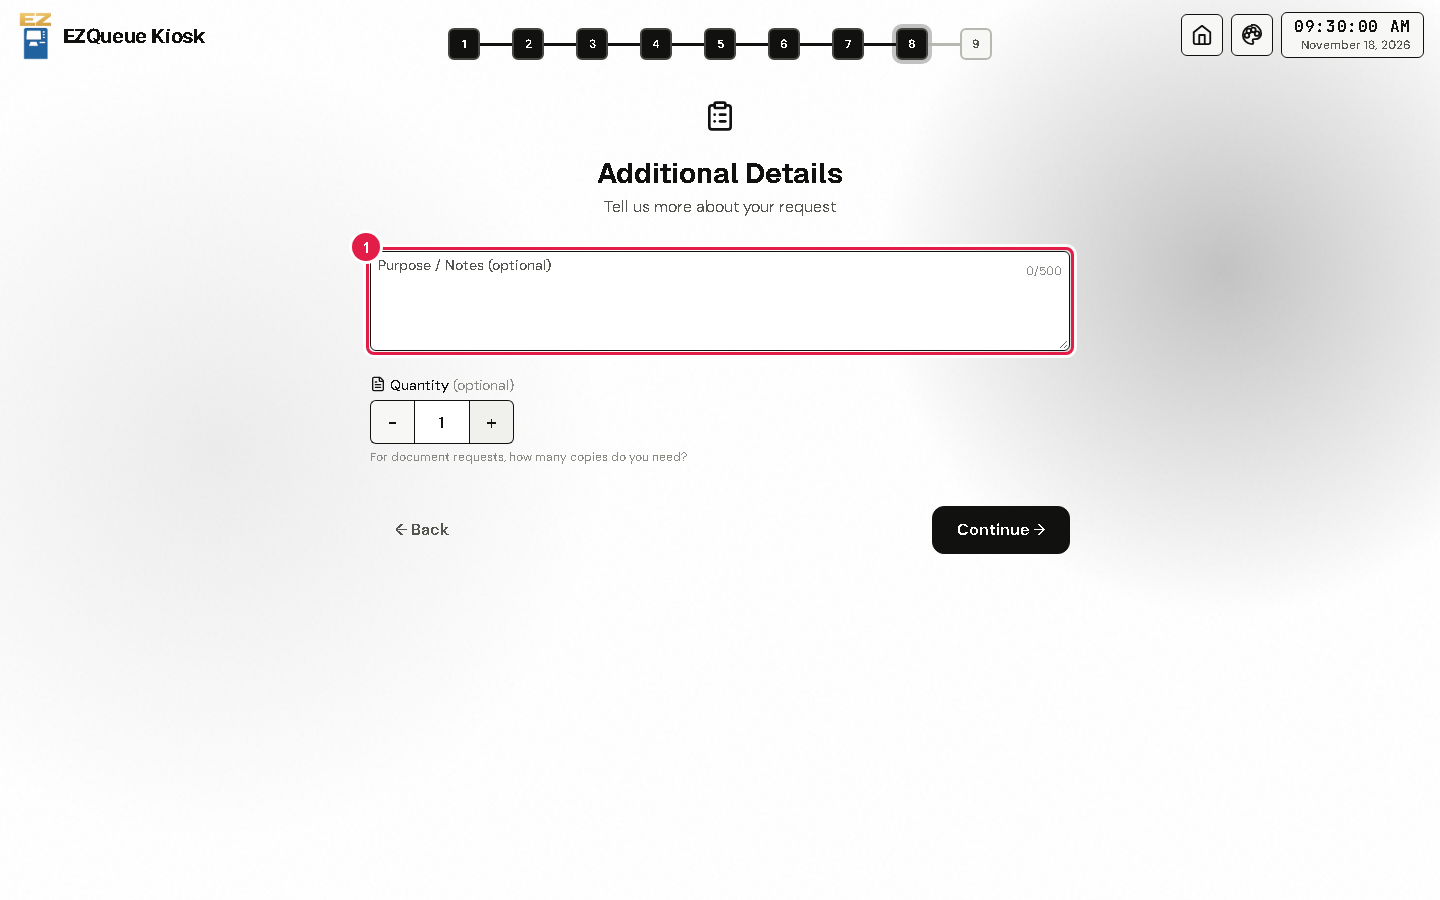
On Additional Details, type why you need the service in Purpose / Notes. This is optional. For documents, set how many copies you need.
Tap Continue.
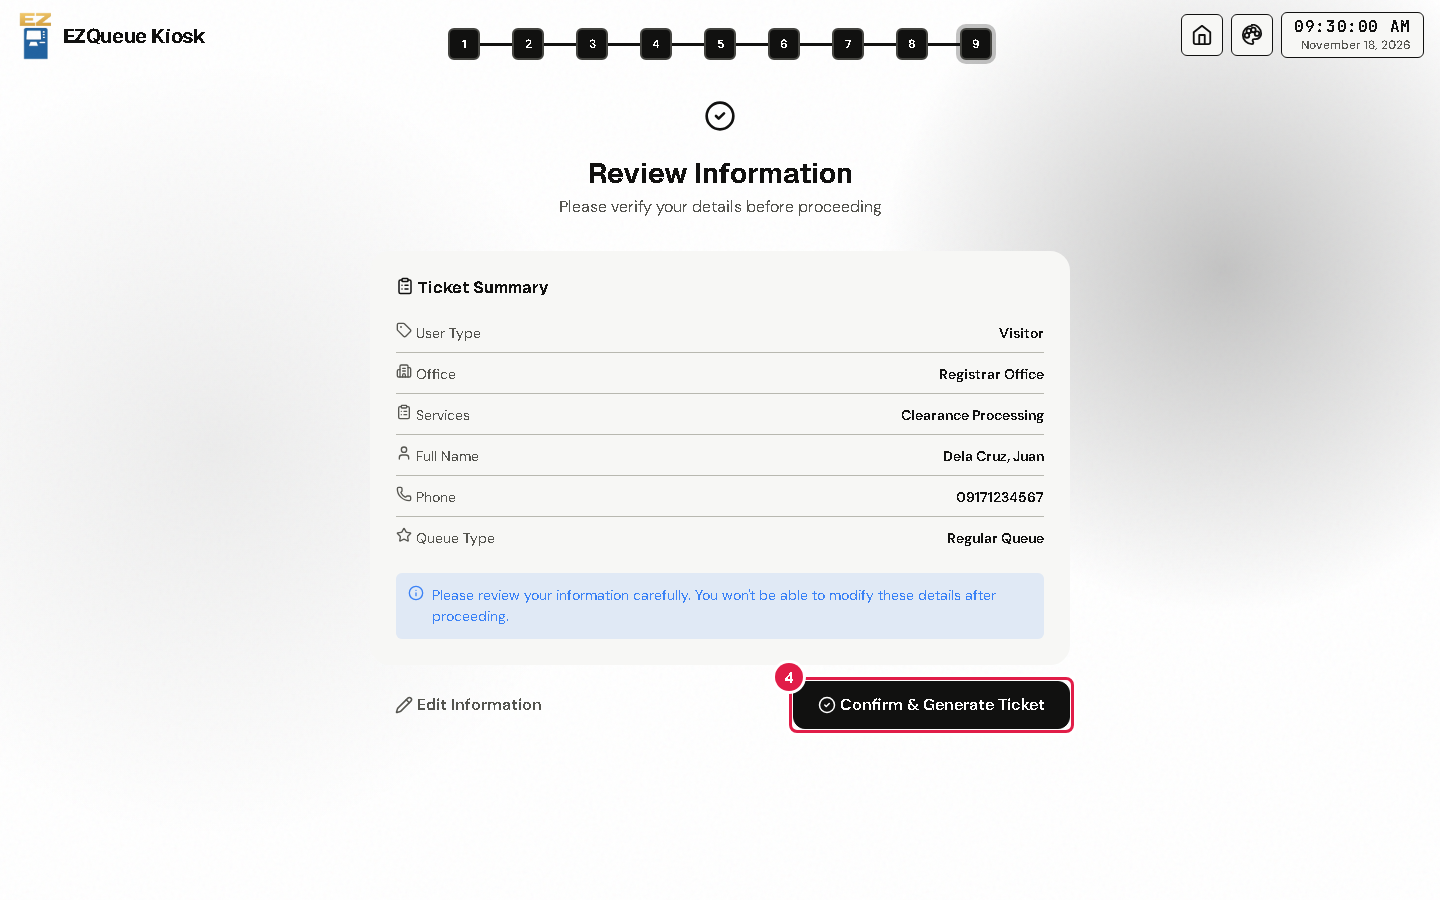
Read the Review Information screen. Check your name, office and service.
If everything is right, tap Confirm & Generate Ticket.
Tip Some services, like document requests, show a longer form before this screen. Fill in each part, then tap Continue.
If something goes wrong
Something is wrong on the review screen: tap Edit Information and fix it.
5Get your ticket and wait for your turn
Take your printed ticket, follow it on your phone, and wait for your number.
What this is for
Your ticket number is your place in line. The TV screen shows it, and a voice reads it out when it is your turn.
Before you start
You tapped Confirm & Generate Ticket.
Steps
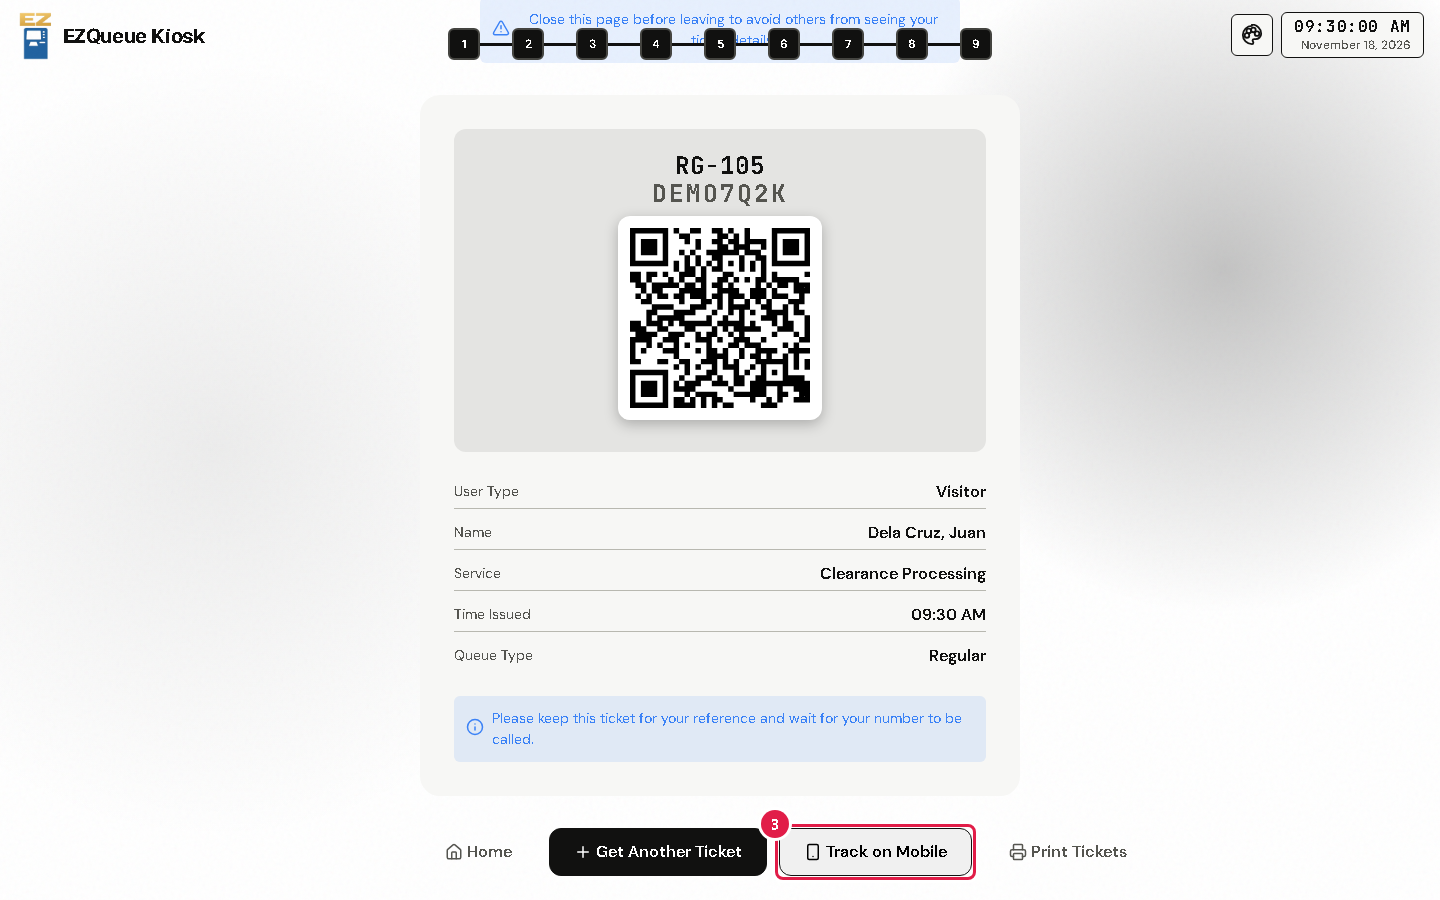
The kiosk shows Ticket Issued Successfully! with your number, for example RG-105. The printer gives you a paper ticket.
No paper came out? Tap Print Tickets.
To follow your ticket on your phone, tap Track on Mobile and scan the QR code.
Tap Home when you are done. The screen asks you to close this page so others cannot see your ticket details. A window with the Remote Portal QR code opens first; tap Back to Home.
Wait for your number. The TV screen shows it and reads it out with the counter to go to.
Warning Keep your ticket for your reference, as the screen asks.
If something goes wrong
The printer is out of paper: tell the staff, and write down your ticket number from the screen.
You need a ticket for another office: tap Get Another Ticket.
6If the kiosk asks "Are You Still There?"
Keep your progress when the kiosk thinks you left.
What this is for
If nobody touches the kiosk for a while, it asks if you are still there. If no one answers before the countdown ends, it starts over.
Before you start
You see a message that says Are You Still There? with a countdown.
Steps
To keep going, tap I'm Still Here (Continue) before the countdown ends.
To start again from the first screen, tap Start Over.
If something goes wrong
The kiosk went back to the first screen: the countdown ended. Start again from Who are you?